How can we help?
How to apply list filters:
applying list filters to Outlook Appointment:
Let’s say you wanted to look for any Outlook appointment that was created by an Agent from Sept 19, 2022 – oct19, 2022
How you do it:
- Click on “add filters”
- Select “Created “ from the dropdown option
- Select the filtered by Created options and pick up a date.
- For instance, in this case, select the custom range from Sept 19, 2022 – oct19, 2022, and apply the dates
- Click apply.
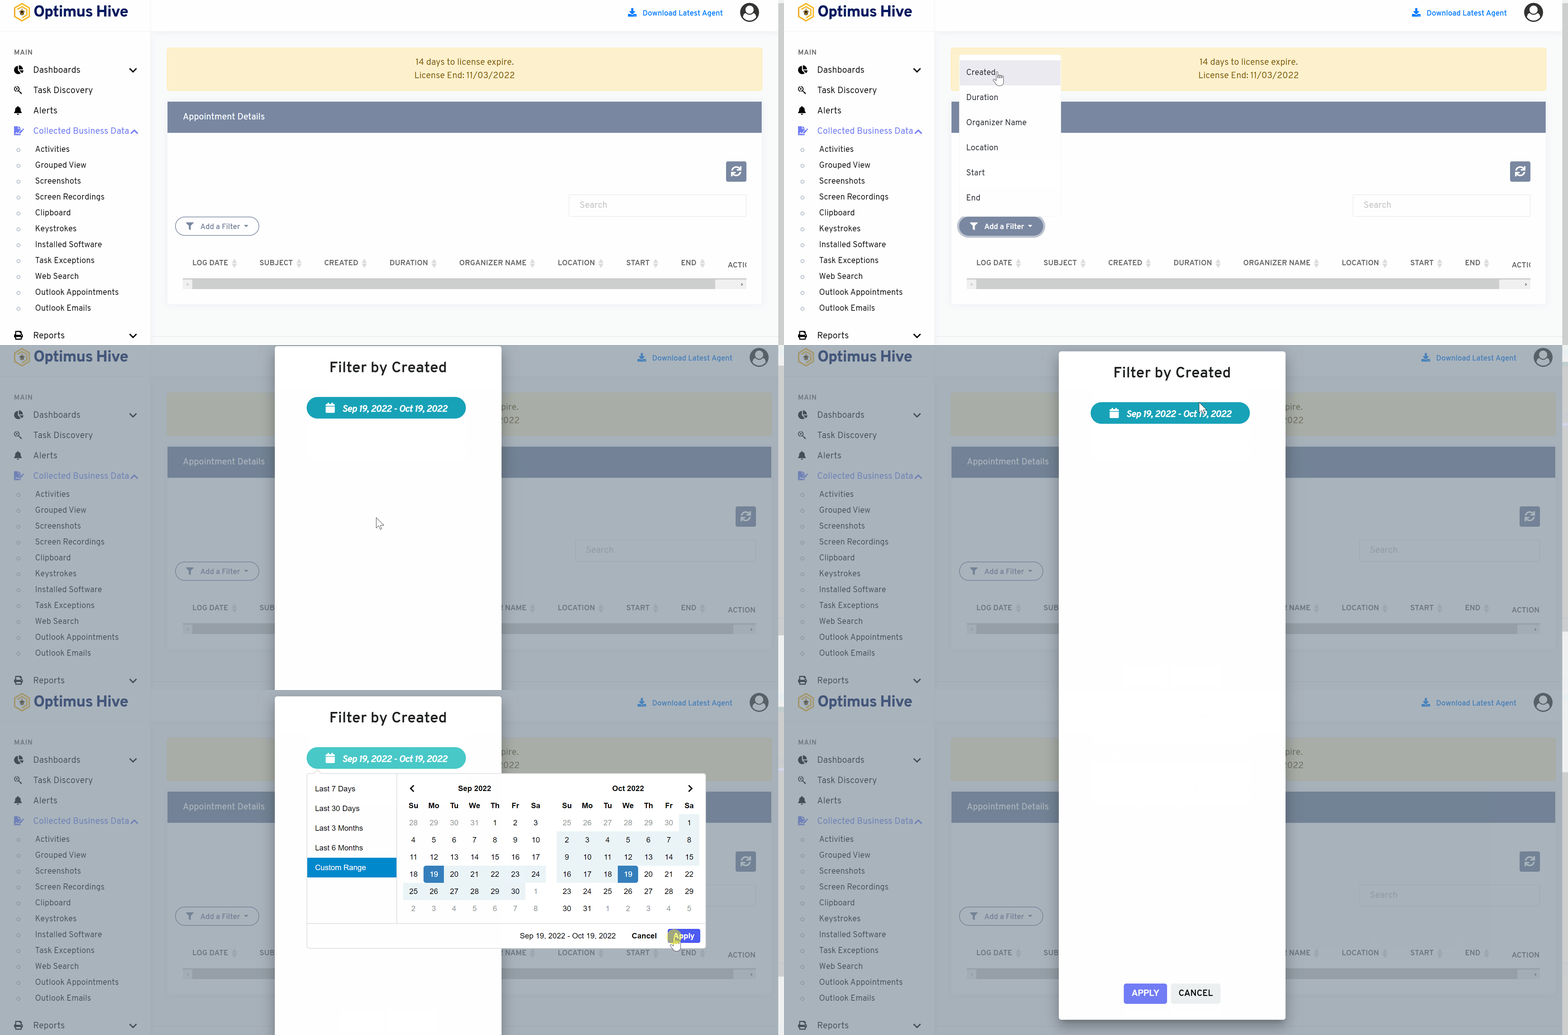
Note: you can also use these steps to add filters for start and end options too.
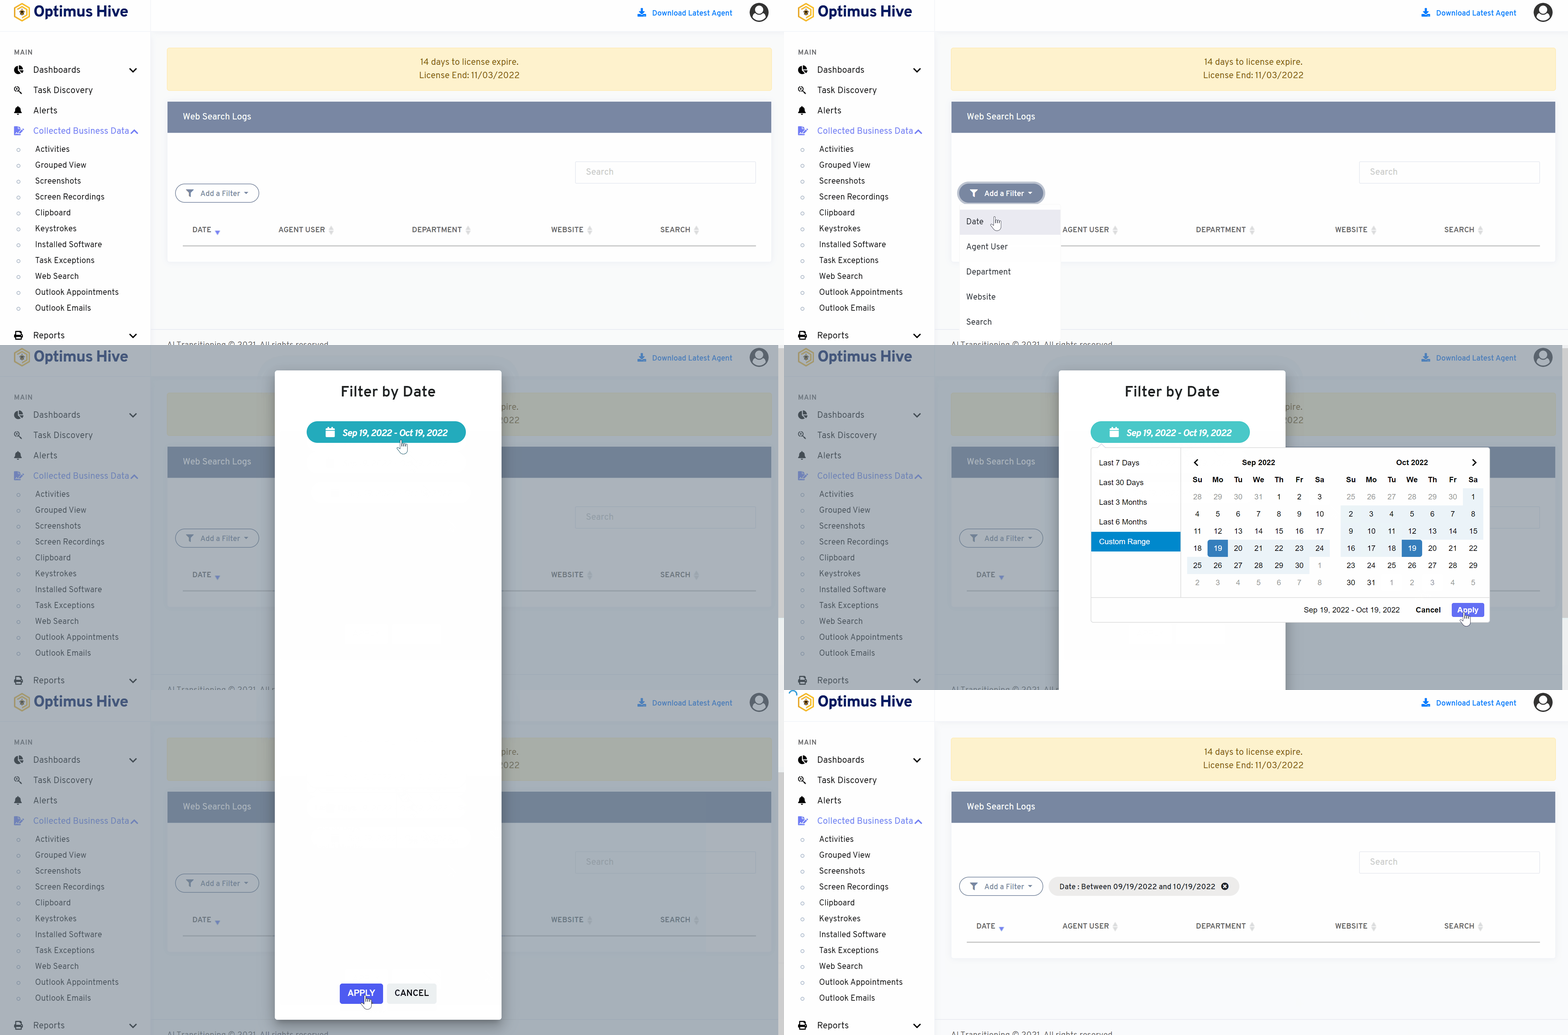
Applying list filters to Web Search:
Let’s say you wanted to look for the web with a date range between Sep 19, 2022, to Oct 19, 2022.
How you can do it:
- Click on “add filters”
- Select “date “ from the dropdown option
- Select the filtered-by-date options and pick up a date.
- For instance, select the custom range between Sep 19, 2022, to Oct 19, 2022 and apply the dates
- Click apply.
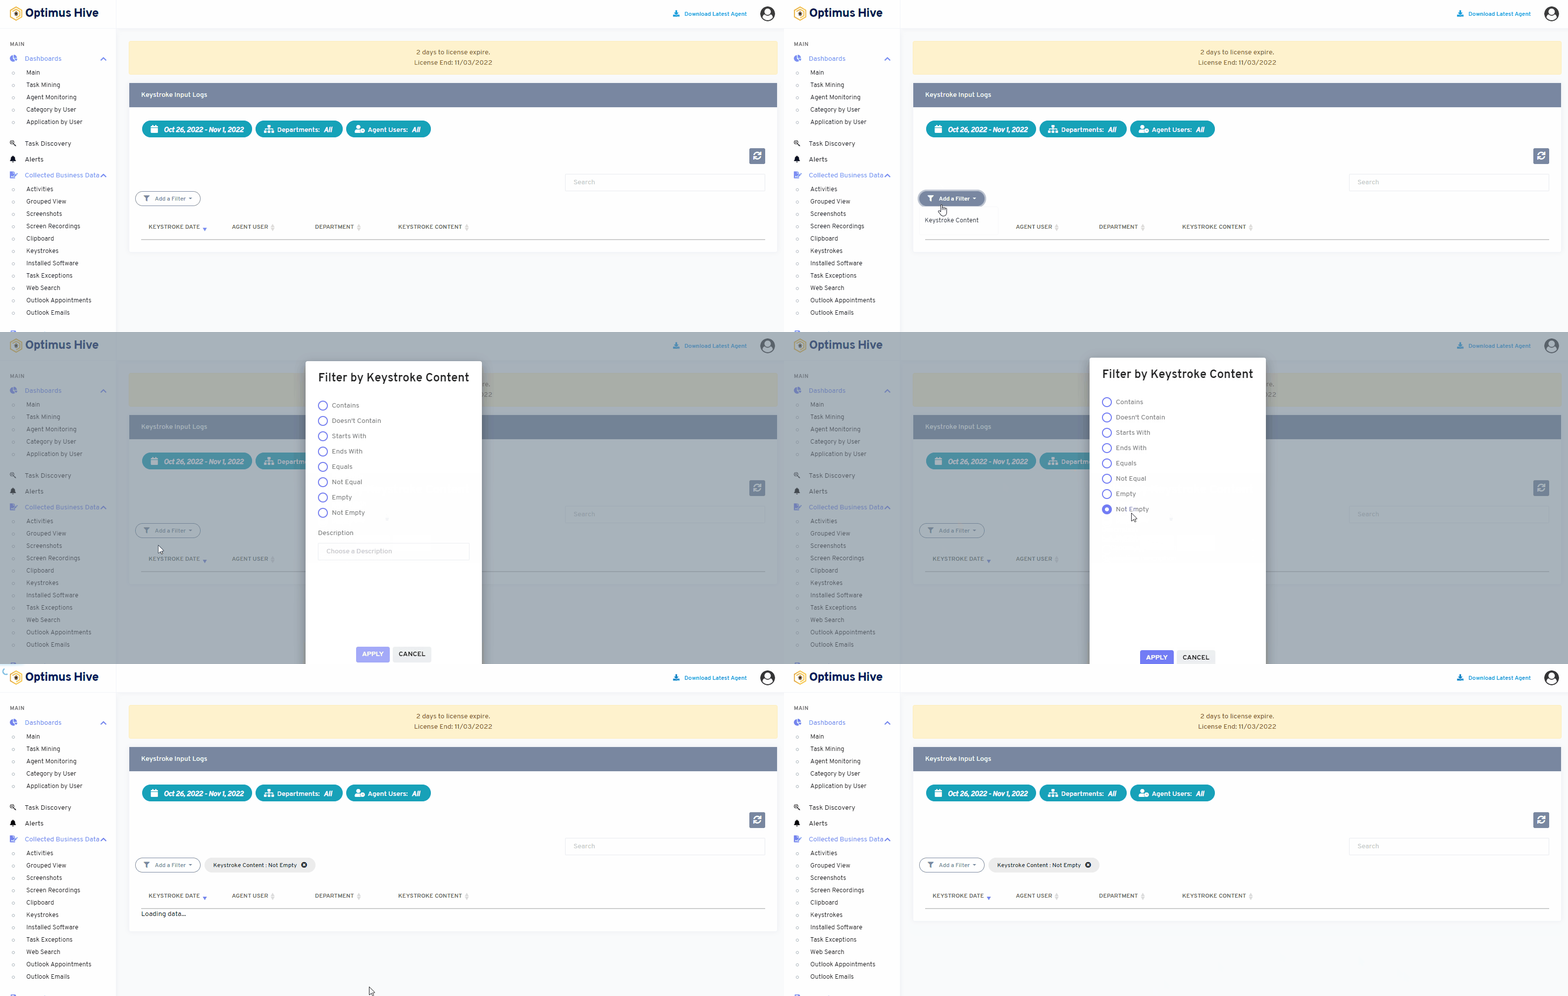
Applying list filters to Keystrokes:
Let’s say you wanted to look for keyword strokes that are not empty.
How you can do it:
- Click on “add filters”
- Select “Keywords content“ from the dropdown option
- Select the filtered by keywords content” options, such as ”not empty”
- Click apply.
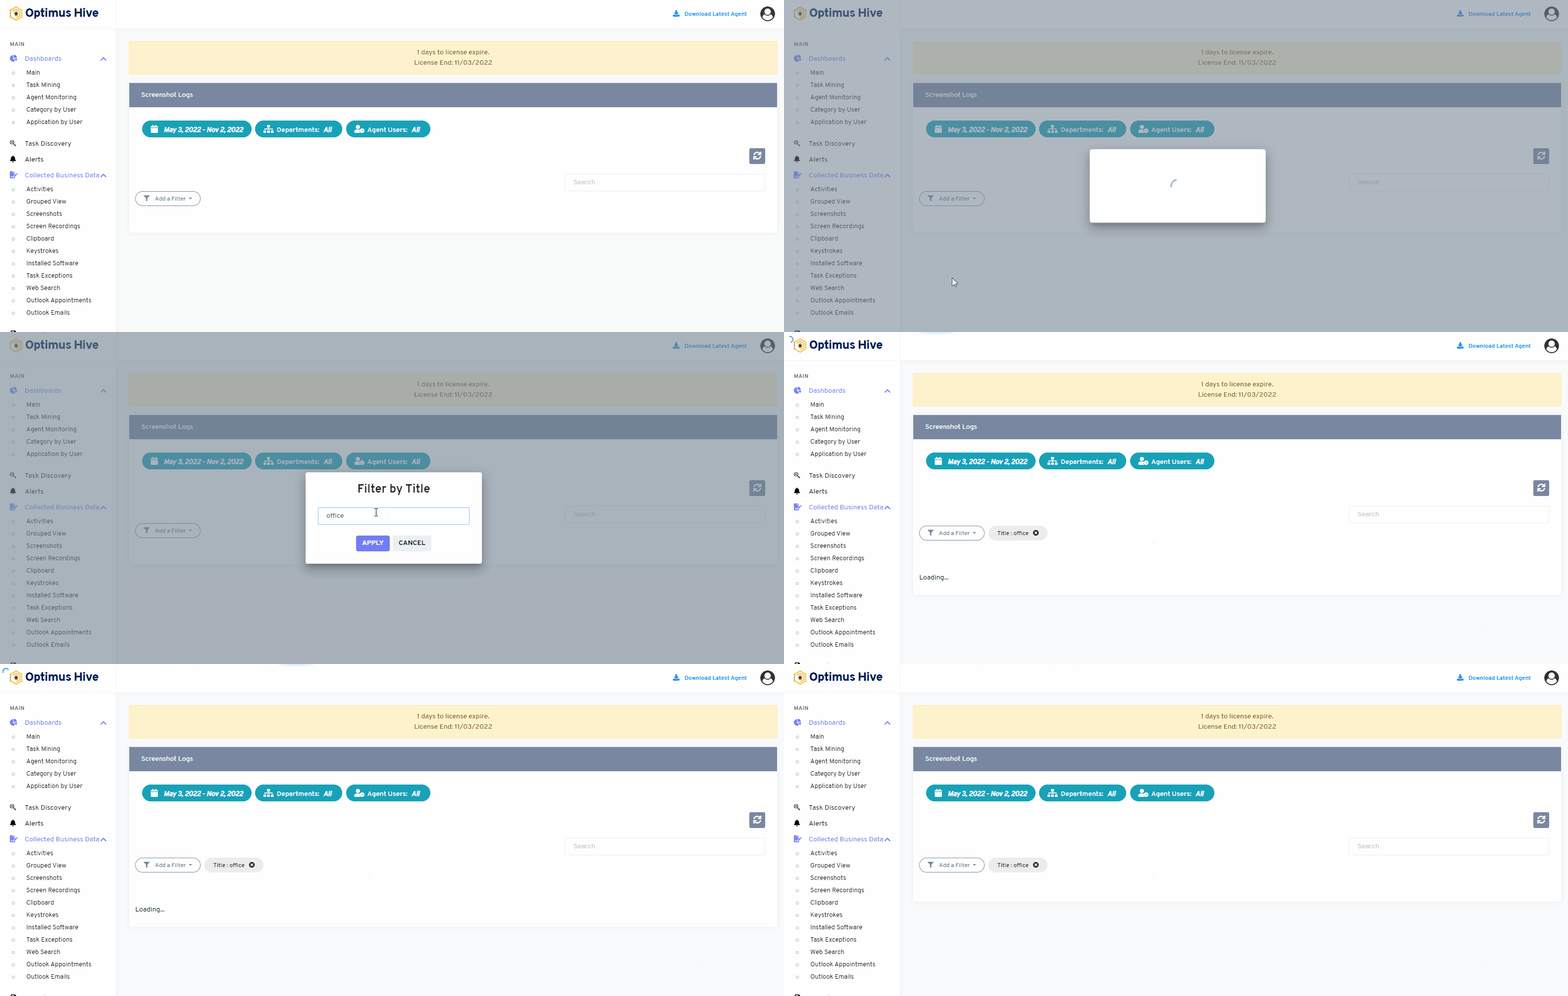
Applying list filters to Screenshots:
Let’s say you wanted to look for screenshots with all the titles named “office”
How do you do it:
- Click on “add filters”
- Select “Titles“ from the dropdown option
- Add the description for the filtered by title, such as “office”.
- Click apply.
Applying list filters to Outlook emails:
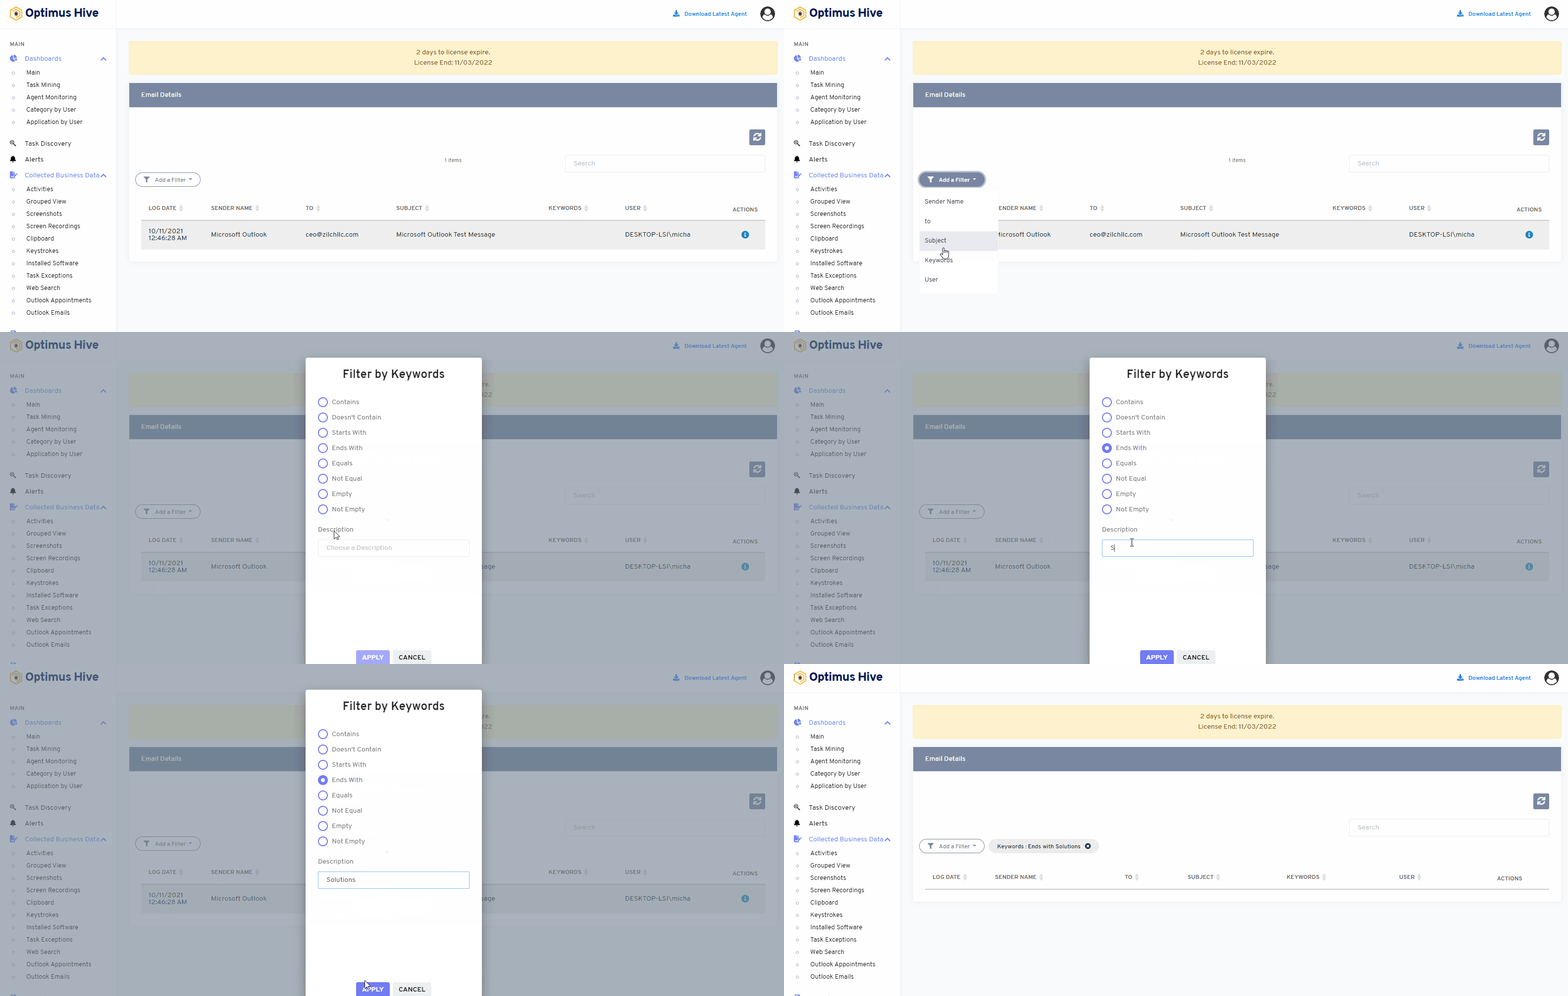
Let’s say you wanted to look for the keyword that ends with “Solutions” in outlook emails
How you can do it:
- Click on “add filters”
- Select “Keywords“ from the dropdown option
- Select the filtered by keywords” options, such as ”ends with”
- Enter the character or word in the description you want to view. For instance, write “Solutions” in the description field
- Click apply.
Applying list filters to Licensed Applications Report:
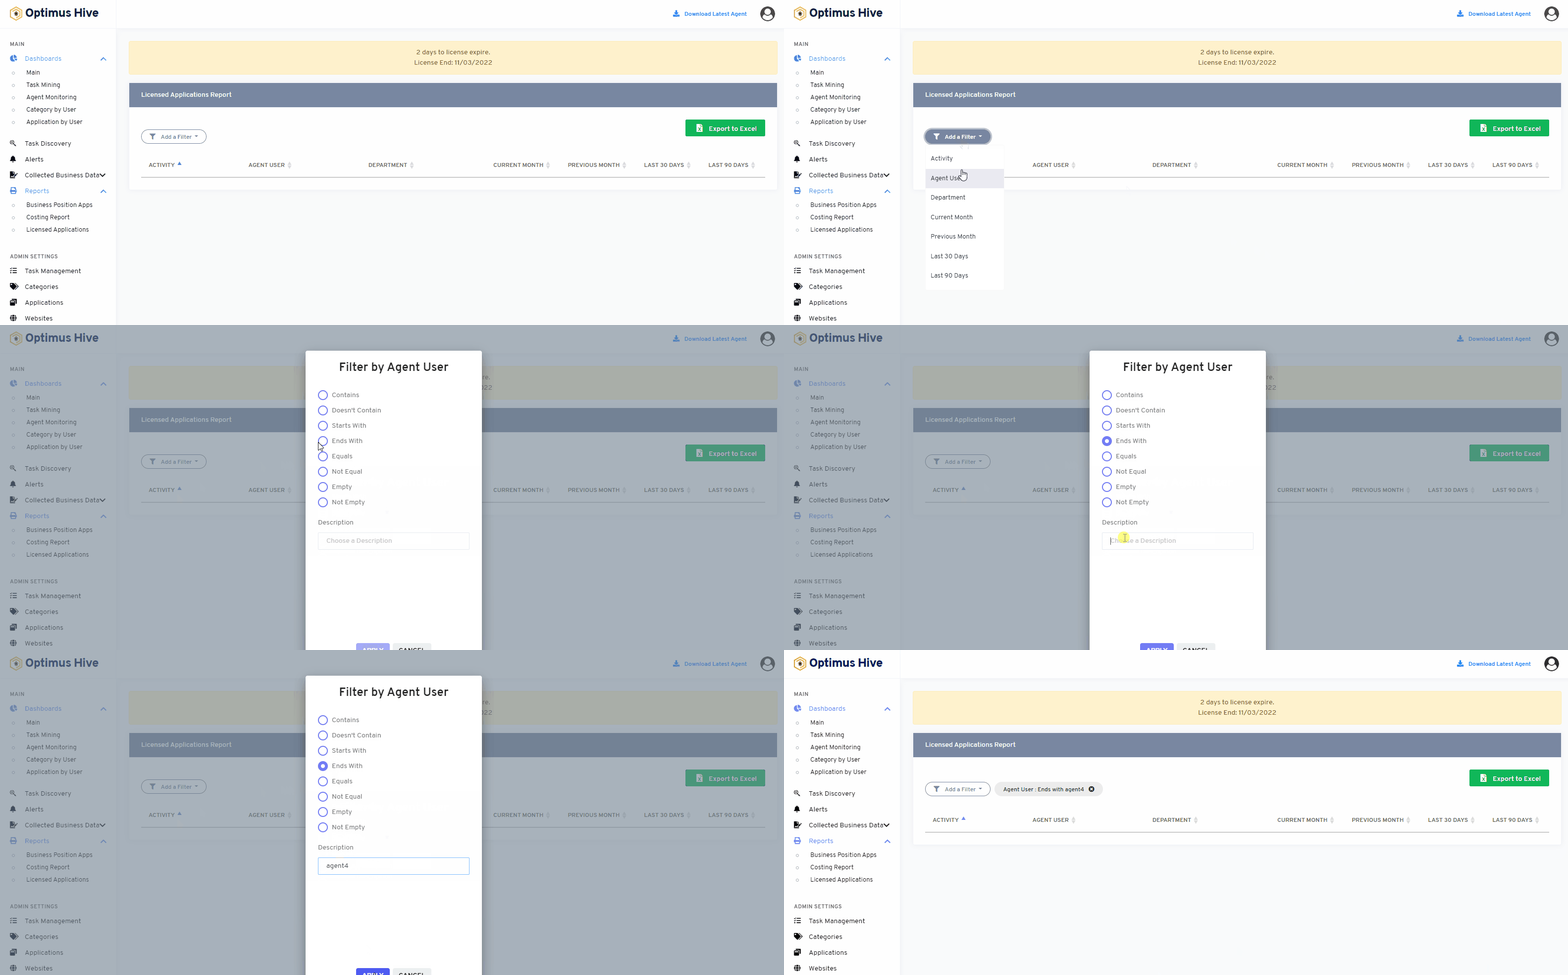
Let’s say you wanted to look for an agent with the name “agent4”.
How do you do it:
- Click on “add filters”
- Select “agent user“ from the dropdown option
- Select the filtered by agent user options, such as “Ends with”.
- Enter the character or word in the description you want to view. In this example, we would enter agent4 in the description field.
- Click apply.
Applying list filters to Costing report:
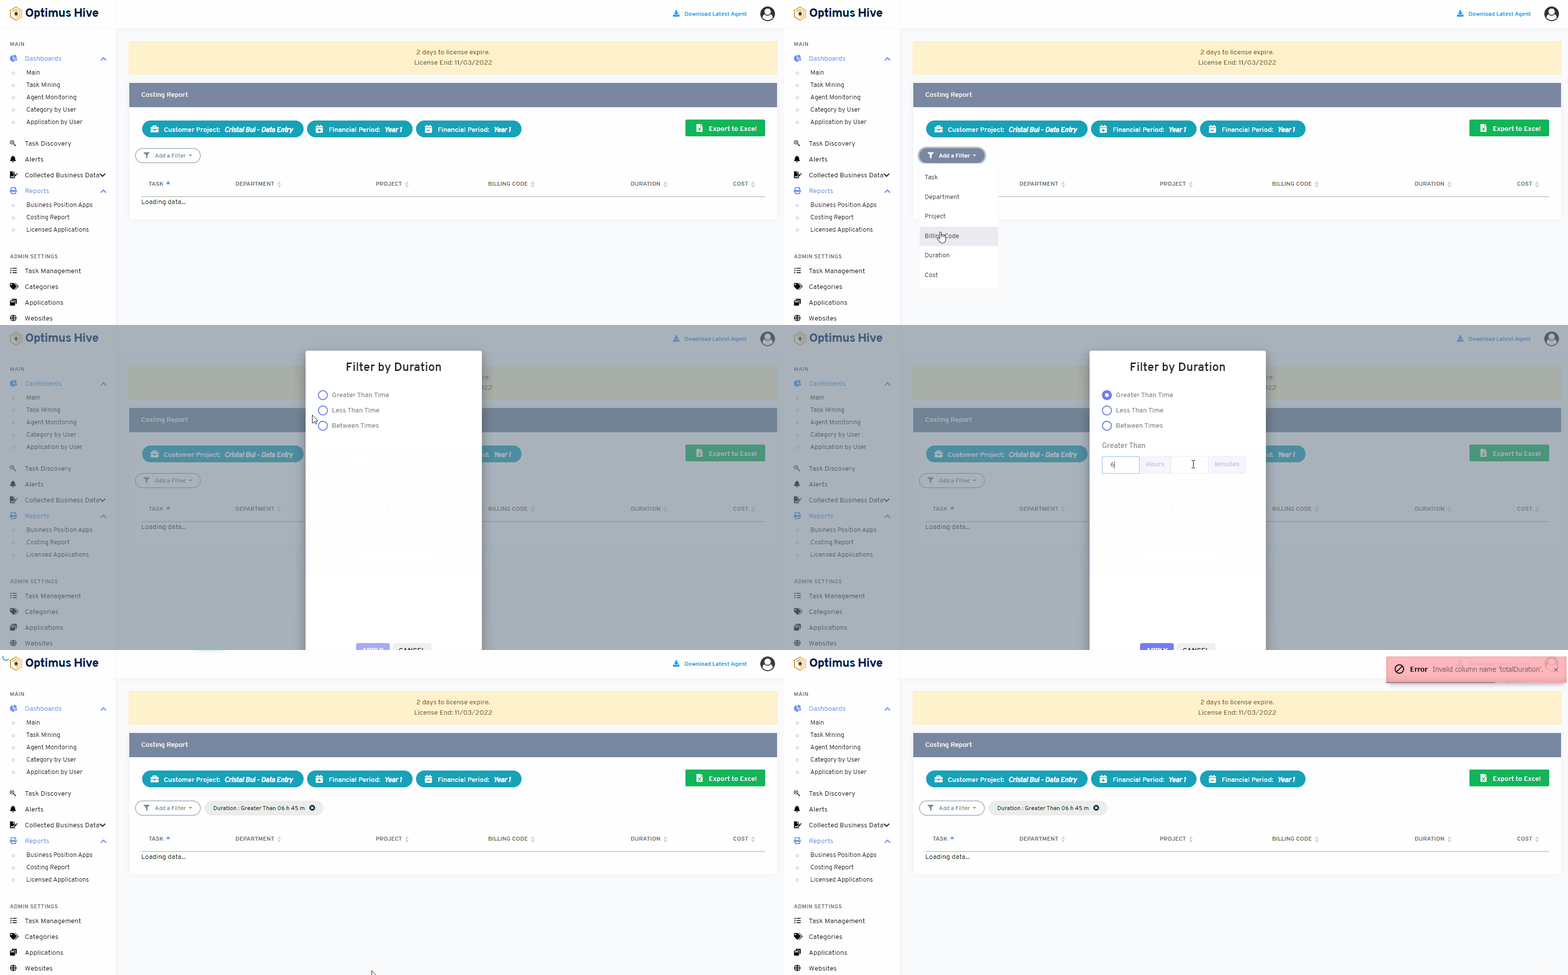
Let’s say you wanted to look for any Costing report activities where an Agent was performing for a duration that is greater than of 6 hours and 45 mins.
how you do it:
- Click on “add filters”
- Select “Duration “ from the dropdown option
- Select the filtered by Duration option, such as “Greater than time”.
- Enter the Greater than details in terms of hours and minutes. For instance, add 6 h and 45 mins respectively
- Click apply.
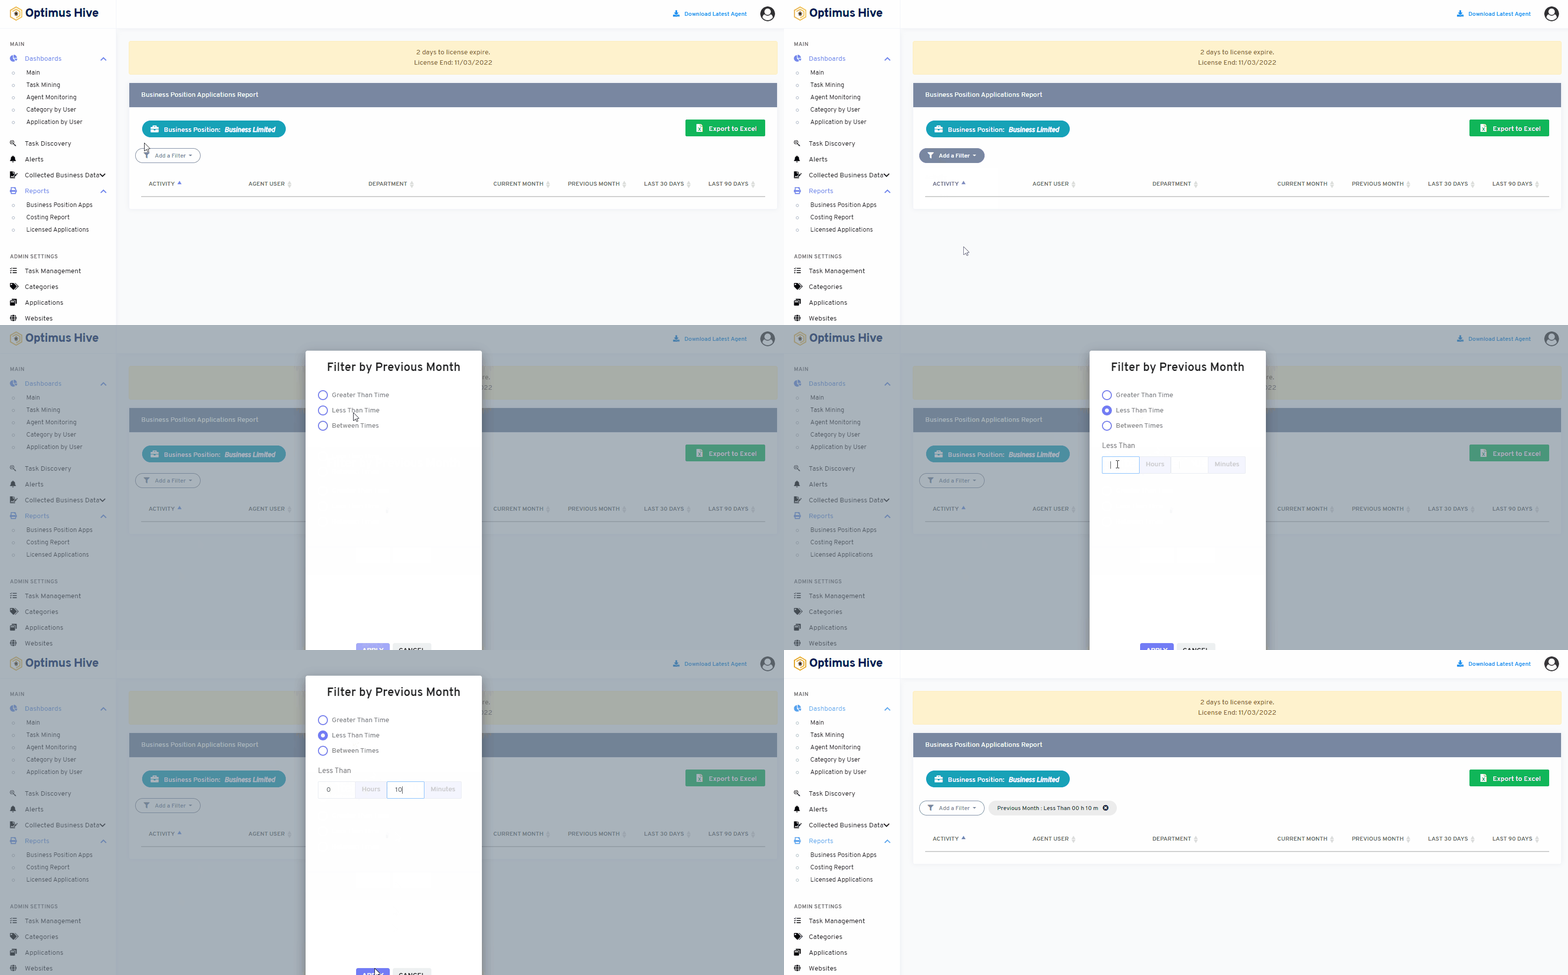
Applying list filters to Business Position Apps Report:
Let’s say you wanted to look for any previous month’s business report activities where an Agent was performing some less than 10 mins.
how you do it:
- Click on “add filters”
- Select “Previous month “ from the dropdown option
- Select the filtered by Previous month option, such as “Less than time”.
- Enter the Less than details in terms of hours and minutes. For instance, add 0 h and 10 mins respectively
- Click apply.
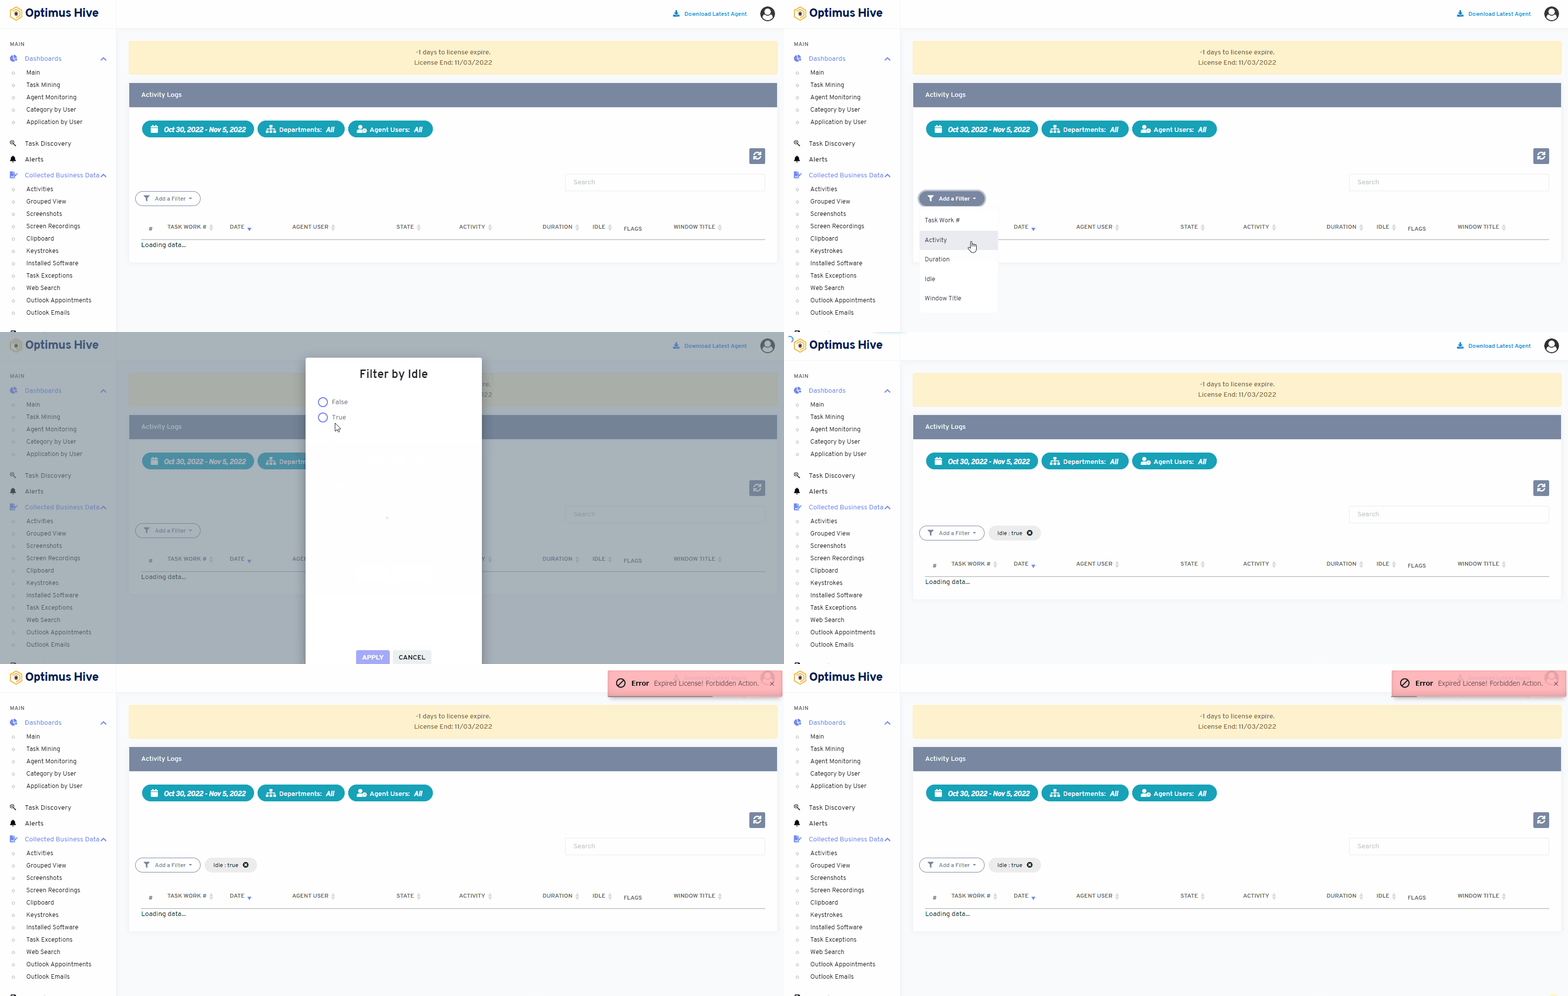
Applying list filters to Activities:
Let’s say you wanted to look for all the activities that are not in the idle state.
How you can do it:
- Click on “add filters”
- Select “Idle“ from the dropdown option
- Select the filtered by Idle” options, such as ”true”
- Click apply.
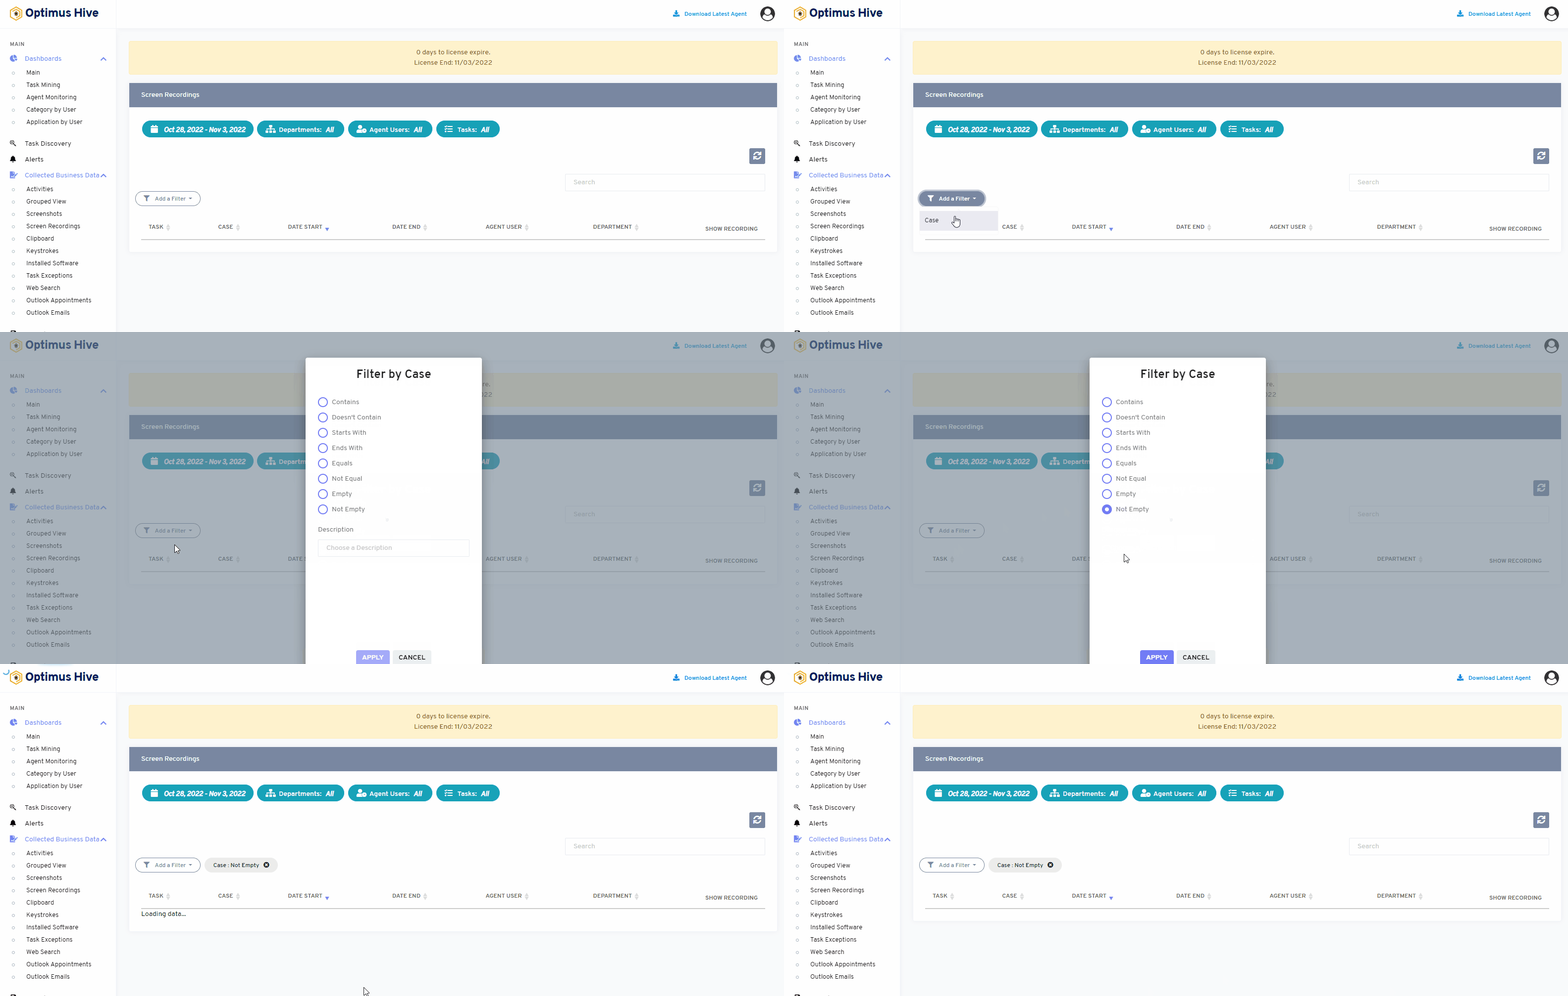
Applying list filters to screen recording:
Let’s say the user wants to view the screen recording based on the case. Here the case will not be empty
- How you do it:
- Click on “add filters”
- Select “Case “ from the dropdown option
- Select the filtered options for instance “not empty”.
- Click apply.
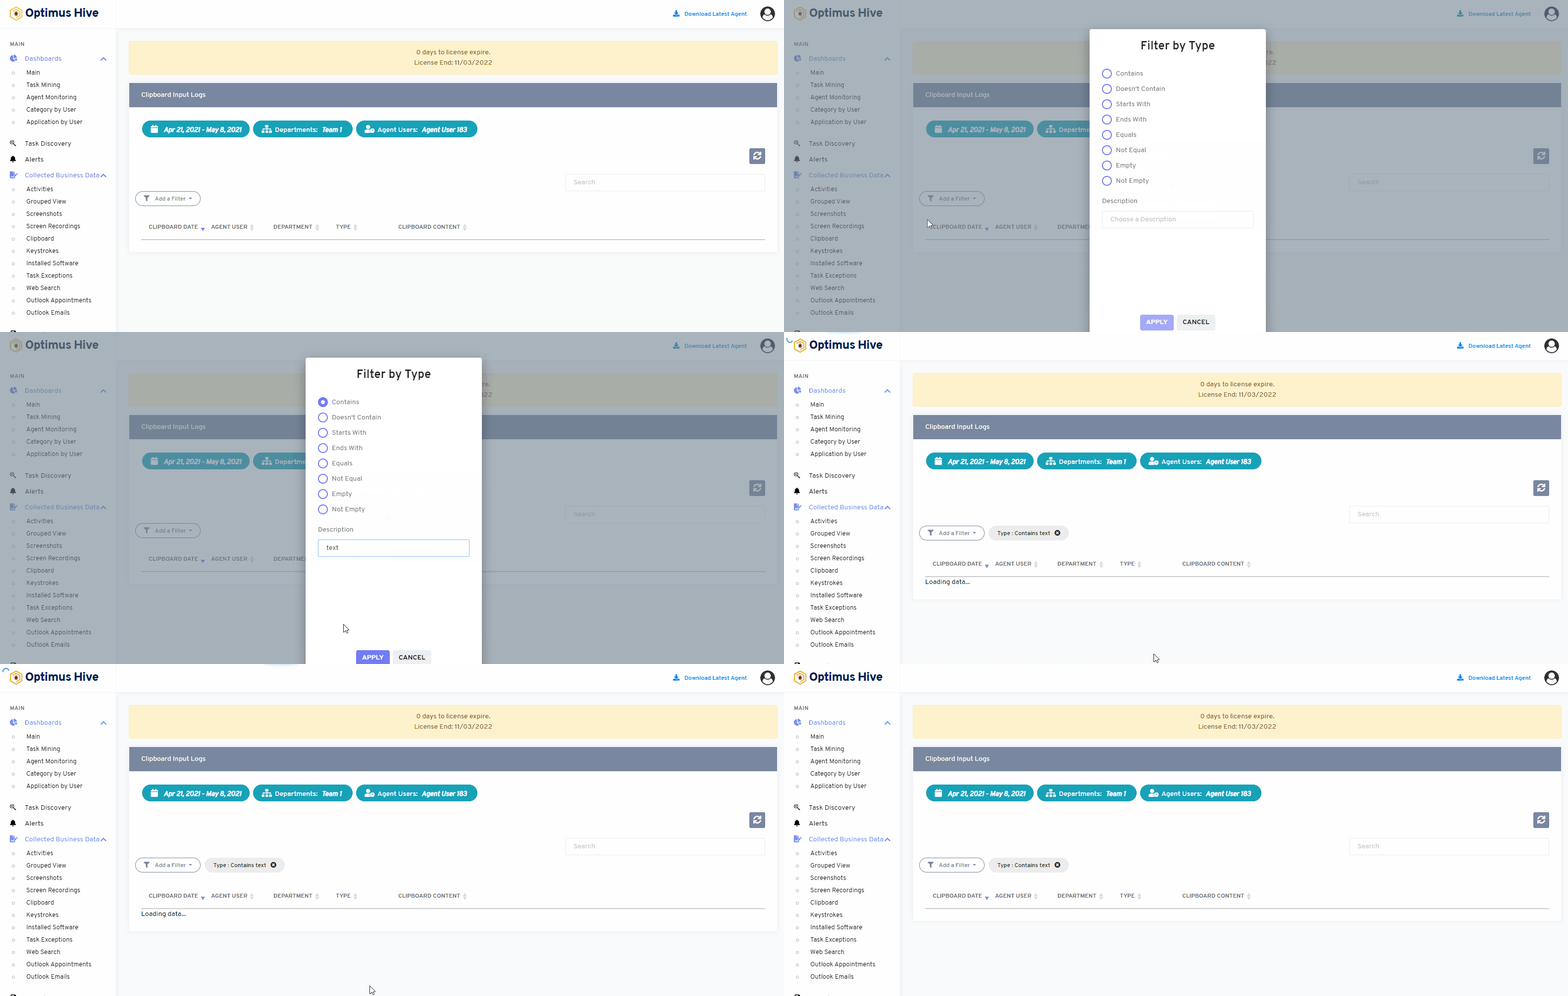
Applying list filters to the clipboard:
Let’s say you wanted to look for a clipboard that contains “text” as its type/format.
How you can do it:
- Click on “add filters”
- Select “Type “ from the dropdown option
- Select the filtered-by-type options, such as “contains”.
- Enter the character or word in the description you want to view. For instance type “text”.
- Click apply.
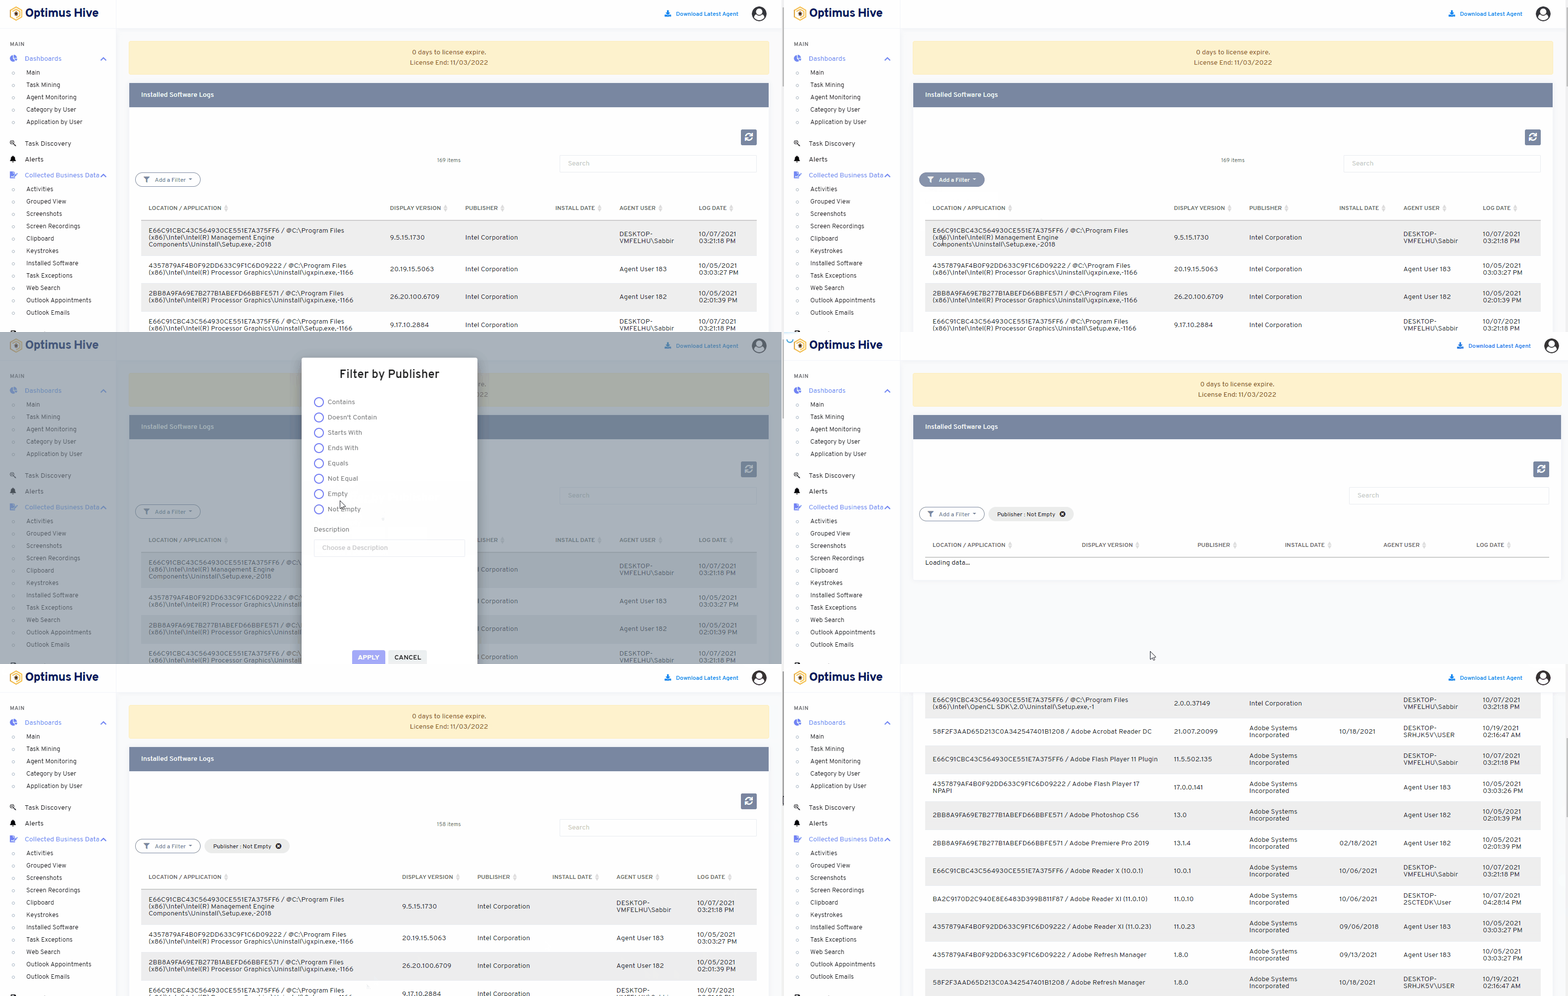
Applying list filters to the installed software:
Let’s say you wanted to look for installed software where the publisher list is not empty.
- Click on “add filters”
- Select “Publisher“ from the dropdown option
- Select the filtered by Publisher” options, such as “not empty”.
- Click apply.
Applying list filters to Task exceptions:
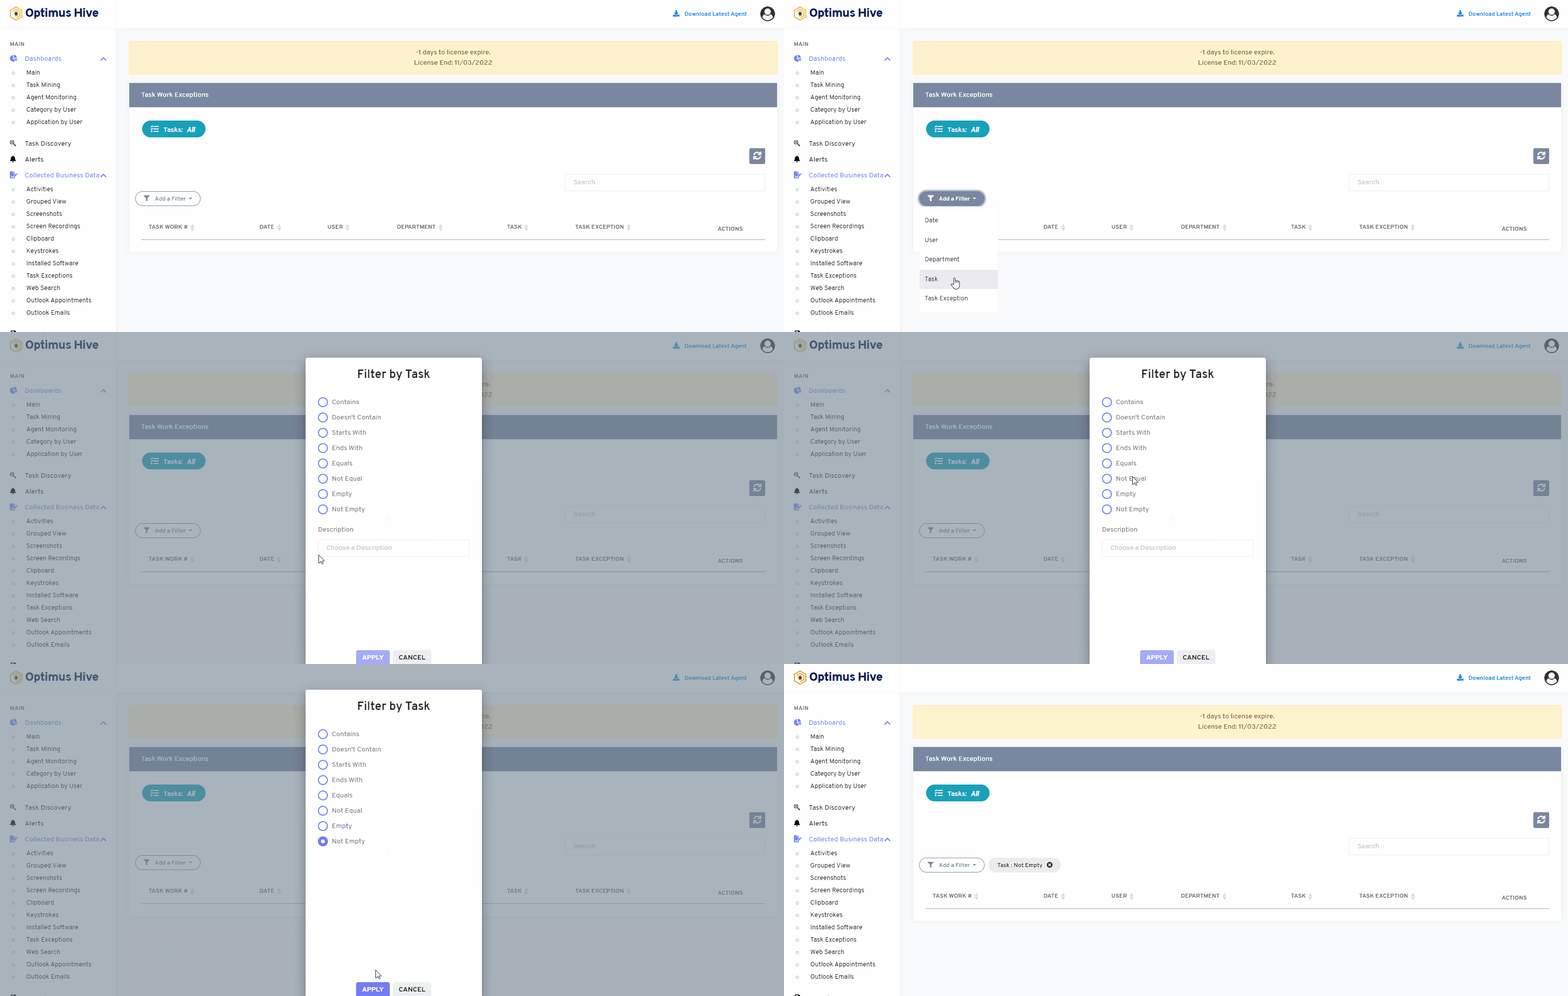
Let’s say you wanted to look for all the task exceptions that are not empty.
How you can do it:
- Click on “add filters”
- Select “task “ from the dropdown option
- Select the filtered-by-task options, such as “not empty”.
- Click apply.
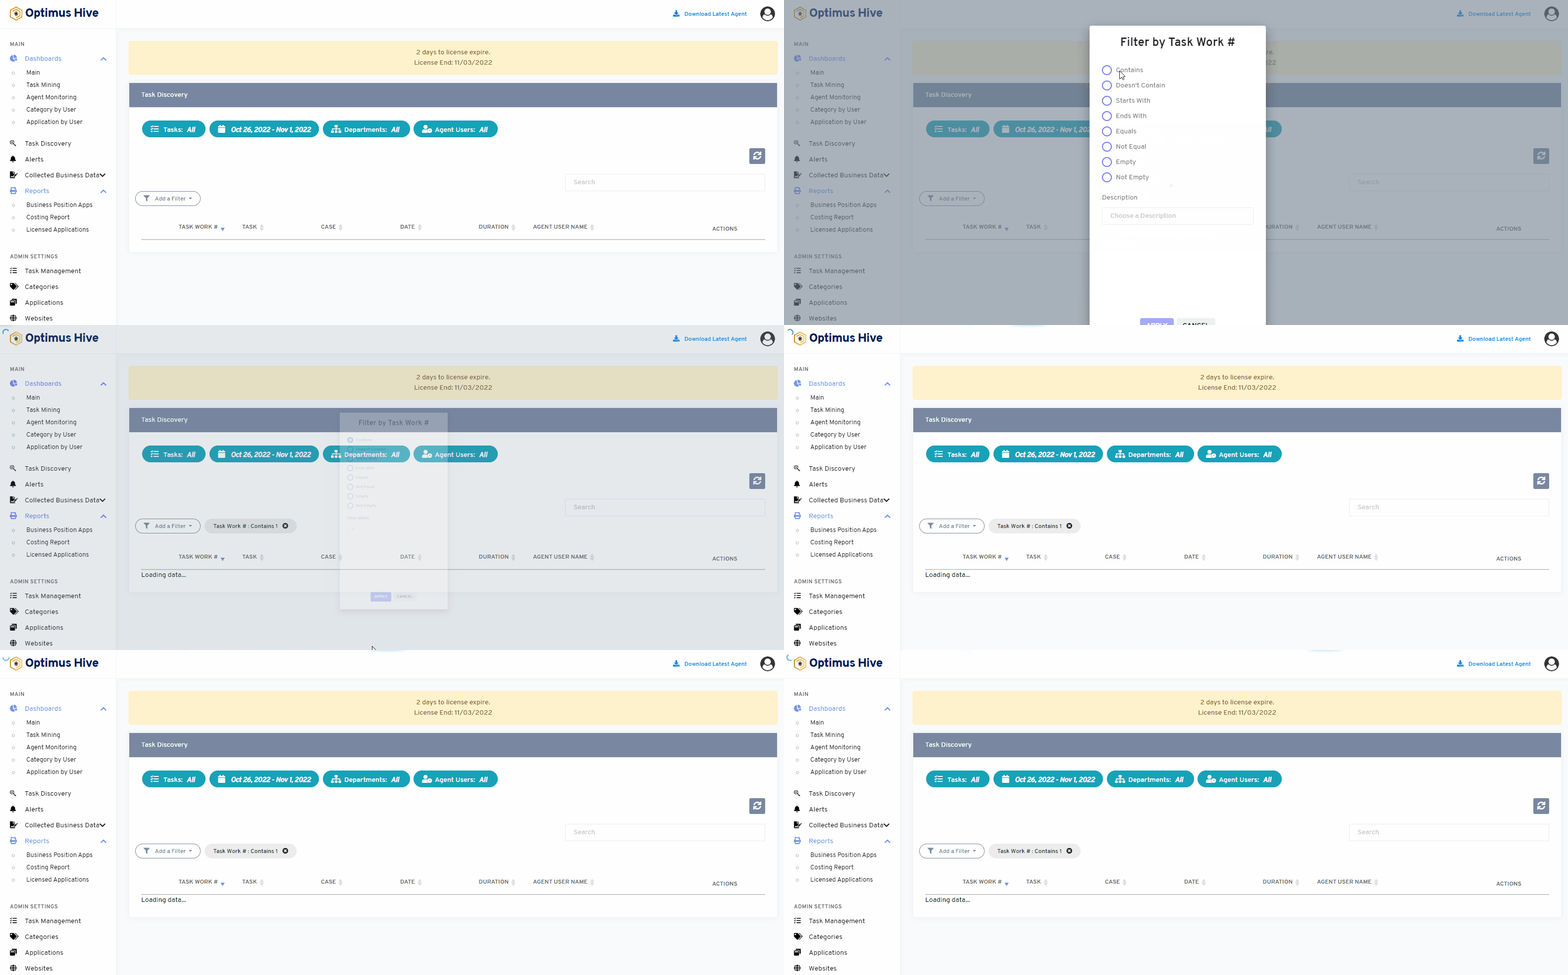
Applying list filters to Task Discovery:
Let’s say you wanted to look for any task that an Agent was performing with its unique task# id as 1.
How do you do it:
- Click on “add filters”
- Select “task# “ from the dropdown option
- Select the filtered by task# options, such as “Contains”.
- Enter the character or word in the description you want to view. In this example, we would enter 1 in the description field.
- Click apply.
